1916: The relief of Kut and the Erzurum Offensive
Second Battle of Kut
- Dates:
- 13 December 1916 – 24 February 1917
- Front:
- Middle East
- Location:
- Both banks of the Tigris around Kut, from the Sannaiyat position on the left bank through the Khadairi Bend, the Hai Salient and the Dahra Bend on the right bank to the Shumran peninsula upstream of the town, central Mesopotamia (present-day Iraq)On the battle map →
- Sides:
- United Kingdom and British IndiaFrederick Stanley Maude, Alexander Cobbe, William MarshallOttoman EmpireHalil Pasha
- Result:
- British victory. The Turks lost all their positions on the Tigris from Sannaiyat to Shumran, abandoned Kut on 24 February 1917 and fell back towards Baghdad.
- Author:
- Łukasz Skowroń
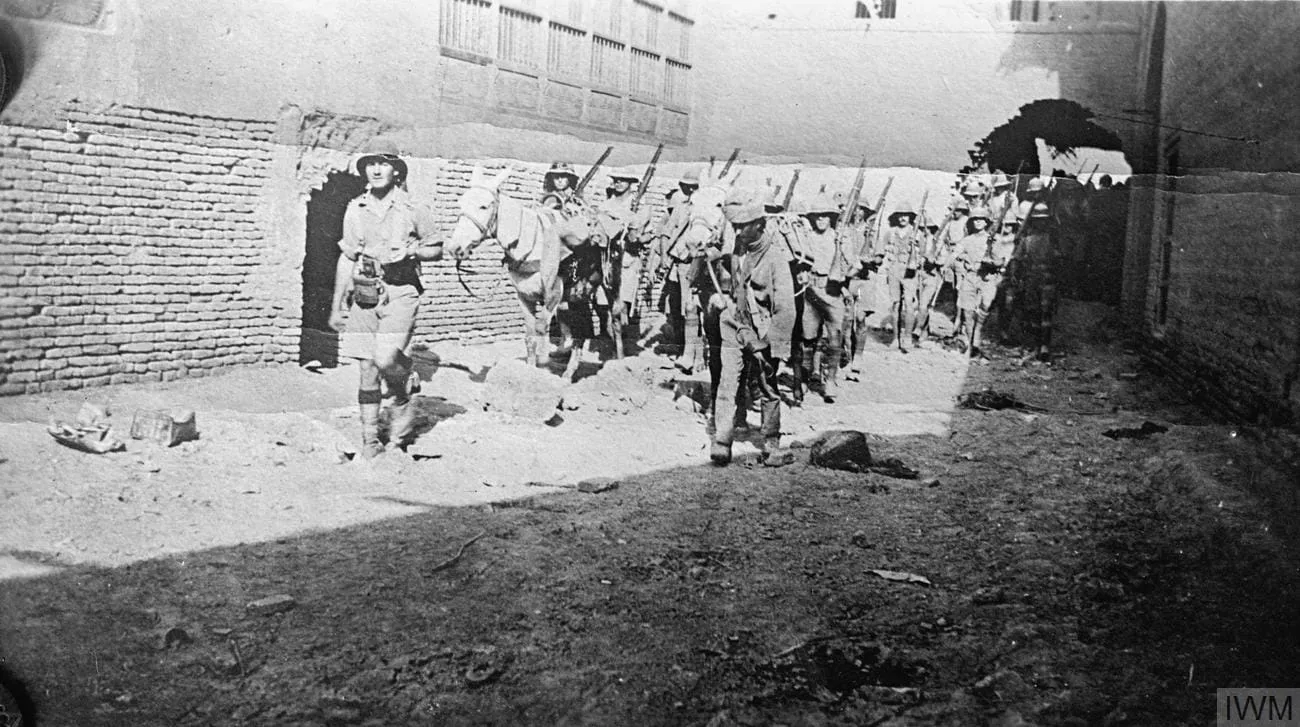
The Second Battle of Kut was revenge for the heaviest British defeat in the Middle East. Eight months after the surrender of Kut, on the night of 13/14 December 1916, General Frederick Stanley Maude moved against the Turks on the Tigris. He did not storm head-on the positions against which three relief attempts had broken in the spring. He went out onto the right bank, cut across the Shatt al-Hai canal and for two months, trench by trench, pushed the Turks out of every bridgehead they held south of the river. The Ottoman troops defended themselves with great courage, but their lines grew thinner. On 22 February 1917 the British broke into the Sannaiyat position, on 23 February they crossed the Tigris at Shumran, upstream of Kut, and on 24 February the Turks abandoned the town and began a retreat towards Baghdad.
Name and dates
The British official history (Moberly, The Campaign in Mesopotamia, vol. III) calls this fighting the Battle of Kut al Amara, 1917 (the Battle of Kut al Amara, 1917) and dates its beginning to 14 December 1916 and its end to 24 February 1917. On this site we call it the Second Battle of Kut, to distinguish it from the fighting of September 1915, when General Townshend’s division took the town. We take 13 December as the start. On that day the artillery of both corps shelled the Turkish positions on the left bank, and after dark the troops moved to their jumping-off positions for the attack, which began before dawn on 14 December. We take 24 February as the end, when the Turks withdrew from Sannaiyat and Kut, and Maude reported that the town “passes automatically into our hands”. British gunboats anchored off Kut in the evening, and the flag over the ruined, deserted town was raised by sailors from the gunboat Mantis on the morning of 25 February. We treat the pursuit towards Baghdad as a separate chapter of the campaign.
Background
After the fall of Kut in April 1916 the British spent the summer merely holding the front on the Tigris, and disease took more men from them than fighting. Maude, who took command in August, spent the whole autumn putting the rear in order. The port at Basra and the river fleet were expanded, a light railway was laid from Sheikh Saad through Es Sinn, new pontoons were brought from England, and a division was formed from two cavalry brigades. The instructions from London were cautious. The Chief of the Imperial General Staff, General William Robertson, forbade Maude operations that would bring heavy losses without corresponding gain.
Through the summer and autumn the Ottoman troops stood in the same positions they had held during the siege, but they greatly strengthened them. On the left bank, behind the Sannaiyat trenches, a series of positions stretched all the way to Kut. On the right bank the Turks held two bridgeheads: trenches across the Khadairi Bend, north-east of the town, and a salient south of Kut, on the lower course of the Shatt al-Hai, with a boat bridge across the canal. They were linked to the left bank by a bridge at the eastern end of the Shumran peninsula and by ferries. Maude estimated the enemy’s strength on the Tigris at about 20,000 rifles and 70 guns. According to the Turkish general staff, XVIII Corps in fact numbered only about 10,500 rifles and 50 guns, because the commander of the 6th Army, Halil Pasha (Halil Kut), had sent part of his forces to Persia and other sectors. In his striking force, that is I Corps under General Alexander Cobbe, III Corps under General William Marshall and the cavalry division, Maude had about 3,500 sabres, 45,000 rifles and 174 guns.
Advance to the Shatt al-Hai (13–20 December)
Maude’s plan was simple: first to establish himself on the Shatt al-Hai, and from there to threaten the Turkish communications, which ran along the front. On 13 December I Corps bombarded Sannaiyat and feinted crossings so that the Turks would expect an assault on the left bank. Before dawn on 14 December the cavalry and the 13th Division crossed the Shatt al-Hai at Basrugiyah and Atab, meeting no resistance, and the sappers put two bridges across the canal. The cavalry came up to the bridge at Shumran, and during the night the pilot of a British aircraft spotted the Turks dismantling the bridge and towing it upstream, and bombed the tug until morning. For three days the Turks had no bridge over the Tigris. In the following days III Corps widened the bridgehead on the Shatt al-Hai. On 20 December General Crocker’s column tried to cross the Tigris by surprise above Shumran, but met resistance and turned back. By that day the British had lost 720 men.
On 22 December Robertson asked whether Maude intended to fight for more or would be content with the position on the Shatt al-Hai. He considered losses of the order of 25 per cent of the infantry engaged to be a reasonable price. Maude replied that crossing a river defended by the enemy was bound to be costly, so he would first clear the Turks from the right bank of the Tigris. From 26 December it poured with rain for nearly two weeks, the ground turned to mud and operations came to a standstill.
The Khadairi Bend (25 December – 19 January)
The first objective was the trenches in the Khadairi Bend, from which the Turks could flood the British lines when the river rose. From Christmas onwards the brigades of General Henry Keary’s 3rd Division, in the rain and under fire from both banks, dug about 22 kilometres of trenches there. On 9 January 1917 they attacked the first line and took it at a cost of almost 700 men. Over the following days they advanced step by step, often in hand-to-hand fighting. On the night of 18/19 January the Turks abandoned the bend and crossed to the left bank. In eleven days of fighting the 3rd Division lost 1,639 men.
The Hai Salient and the Dahra Bend (25 January – 16 February)
Now III Corps attacked the salient on the Shatt al-Hai. On 25 January brigades of the 13th Division took part of the first line, but Turkish counter-attacks recaptured one stretch after another, and the fighting dragged on for a week. On the night of 3/4 February the Turks gave up the whole eastern bank of the canal. According to Maude, since 13 December the British had lost 8,524 men, including 2,079 killed and missing. They had buried 2,006 Turkish dead and taken 579 prisoners, and they estimated the enemy’s losses at more than 10,000.
The last Turkish bridgehead on the right bank lay in the Dahra Bend, between the liquorice factory and the Shumran peninsula. From 9 February the 13th and 14th Divisions tightened a ring around it. On 15 February, helped by accurate artillery fire and a skilfully feinted Gurkha attack, they broke through the defence, and by the morning of 16 February the bend had been cleared. According to the official history, in the fighting for the bend the British took 1,995 prisoners, mainly Turks from Anatolia, and found about 250 dead. The British official history pays tribute to the defenders: with an impassable river at their backs, with few ferries, without sufficient food and with inferior artillery, they held out for two months with remarkable tenacity and went on counter-attacking until the last days. The Turkish officer Muhammad Amin later wrote that this defence cost the Turks more than the British, because it broke the strength of XVIII Corps.
Sannaiyat and Shumran (17–24 February)
The right bank was clear, and Maude decided to force the Tigris. To draw the Turkish reserves downstream, I Corps attacked Sannaiyat. The first attack, on 17 February, broke down in the rain and under counter-attacks, and the 7th Division lost 575 men. On 22 February the Highlanders and the 92nd Punjabis took the first two lines, paying for this success with the loss of 1,332 men. The Turks threw in everything they had at hand. On the night of 22/23 February pontoons with sappers crossed at Magasis as a feint.
At dawn on 23 February, at three crossing points at the eastern end of the Shumran peninsula, pontoons set out carrying the 2nd Battalion of the Norfolk Regiment and two Gurkha battalions. They were rowed by soldiers of the Hampshires, sappers and pioneers, and many of them fell under fire from the left bank. At one crossing only a few pontoons came back from the far side, and the Gurkhas’ bridgehead shrank to a few dozen men. The Norfolks, however, held on to the bank, and further companies crossed behind them. By 4.30 p.m. a pontoon bridge about 270 metres long, built in eight hours in a strong current, was ready. Before midnight the whole 14th Division had crossed it. The crossing cost about 350 men, and more than 540 Turks were taken prisoner.
Halil Pasha realised that he could not hold the line on the Tigris. During the night he ordered the 51st Division to abandon Sannaiyat, and the troops at Kut to retreat to a position at Kala Shadi. On 24 February Turkish rearguards held up the 14th Division and the cavalry on the Shumran peninsula, while the 7th Division advanced through the abandoned Sannaiyat trenches. In the evening Maude reported that he held all the enemy’s positions from Sannaiyat to Kut.
Losses
The official history does not give a full account of both sides’ losses. By 4 February the British had lost 8,524 men, and in the following three weeks at least several thousand more: at Sannaiyat on 17 and 22 February the 7th Division lost more than 1,900 men in all, about 350 in the crossing at Shumran, and the 14th Division about 1,100 in the fighting on the peninsula on 24 February. Turkish losses were certainly heavier. The figures given by Moberly for the individual stages alone add up to several thousand prisoners, including almost 2,000 in the Dahra Bend and more than 1,200 at the crossing and on the Shumran peninsula. According to British estimates, on the day of the crossing the Turks had only about 9,000 rifles left on the Tigris.
Significance
The battle gave the British back the initiative in Mesopotamia and erased the memory of the surrender of April 1916. Maude telegraphed that the town itself now had only sentimental value, but for British prestige in the East its recovery was very important. Something else mattered more, however: XVIII Corps was shattered and the Tigris was open to British vessels. On 26 February the gunboats caught up with the fleeing Turkish steamers and recaptured the gunboat Firefly, lost at Umm al-Tubul in December 1915. After a short pause at Aziziyah, Maude’s troops moved on and entered Baghdad on 11 March 1917.
Spotted a mistake?Report an error