1915: The Dardanelles
Battle of Gully Ravine
- Dates:
- 28 June – 5 July 1915
- Front:
- Middle East
- Location:
- Western flank of the Helles front, Gully Ravine (Turkish Zığındere) and the Gully Spur and Fir Tree Spur ridges above the Aegean Sea, south-west of the village of Krithia (today Alçıtepe), Gallipoli peninsula, Ottoman Empire (today Turkey)On the battle map →
- Sides:
- United Kingdom and British IndiaIan Hamilton, Aylmer Hunter-Weston, Henry de LisleOttoman EmpireOtto Liman von Sanders, Erich Weber
- Result:
- British victory on the western flank. They took five lines of Turkish trenches on Gully Spur and beat off all counter-attacks, but were defeated on Fir Tree Spur.
- Author:
- Łukasz Skowroń
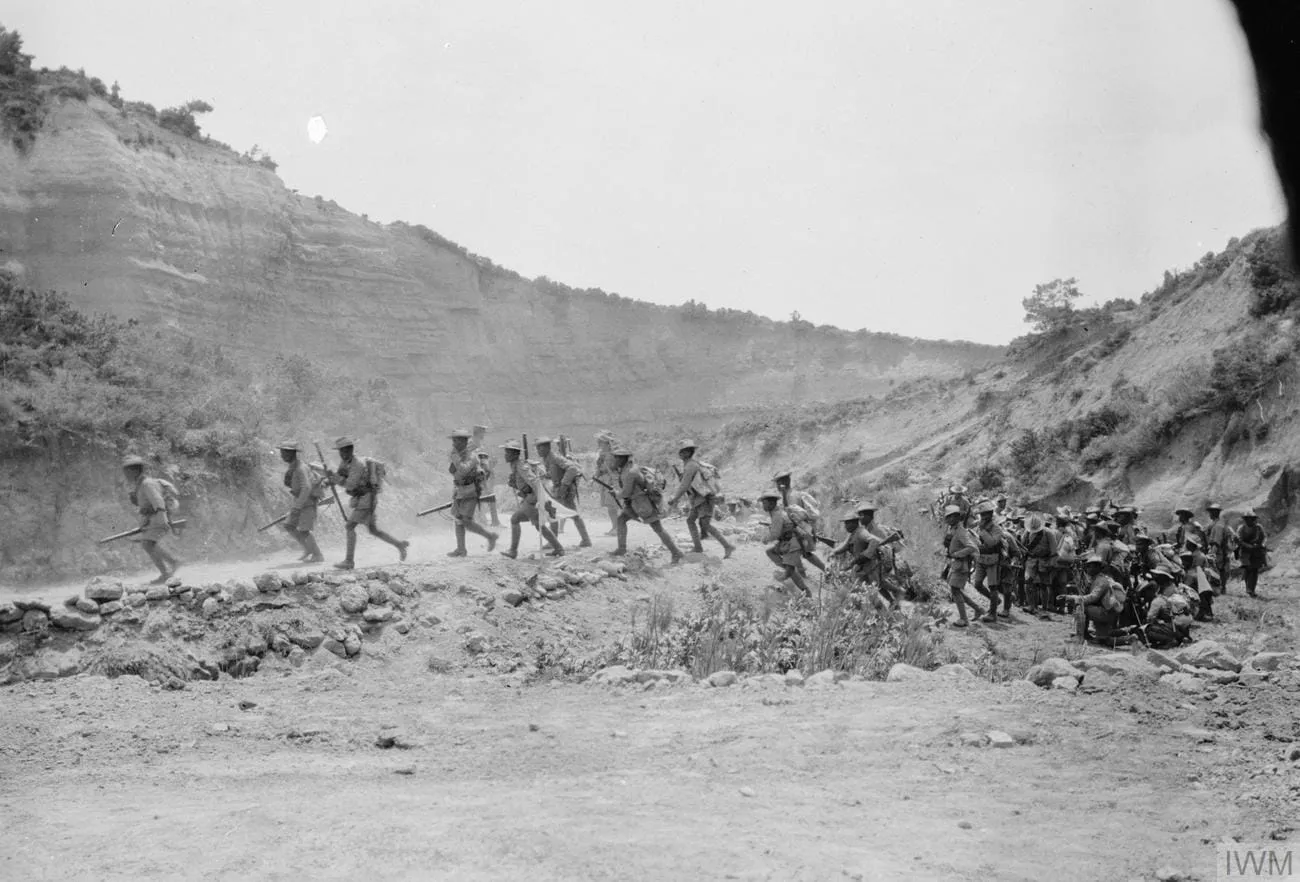
The Battle of Gully Ravine was one of the few successful Allied attacks at Helles, at the southern tip of the Gallipoli peninsula. On 28 June 1915 the British 29th Division and the 29th Indian Brigade, supported by the concentrated fire of almost all the artillery, took five lines of Turkish trenches on the coastal ridge of Gully Spur and pushed the western flank of the front a few hundred metres towards Krithia. On the other side of the ravine, on Fir Tree Spur, a Scottish Territorial brigade, deprived of howitzer support, was decimated within minutes. For the following week the Turks, having brought up reinforcements from the whole peninsula, counter-attacked again and again to recover the lost trenches. They suffered heavier losses than in any earlier battle of the campaign and recovered nothing.
Name and dates
The British official history calls the fighting the Action of Gully Ravine; in English-language literature the name Battle of Gully Ravine has become established. The Turks speak of the battle of Zığındere (Zığındere Muharebesi, also Sığındere), from the Turkish name of the ravine. We take the British attack of 28 June as the beginning and the failed Turkish assault of 5 July, after which the fighting died down, as the end. This is how both Turkish and English-language works date the battle.
Background
After the Third Battle of Krithia on 4 June, the commanders at Helles, the British General Aylmer Hunter-Weston and the French General Henri Gouraud, concluded that with so few howitzers it was impossible to attack along the whole front at once. They decided first to take the Turkish trenches on both flanks, each in a separate attack with the fire of all available artillery, and only then to straighten the centre. General Ian Hamilton agreed, although he was already planning the main blow elsewhere. On 7 June the Dardanelles Committee decided to send him three New Army divisions, due to arrive in July, and Hamilton intended to use them for a great attack from the Anzac bridgehead. The attacks at Helles were to keep up the troops’ morale, gain some ground and distract the Turks’ attention.
The French struck first. On 21 June, after a bombardment many times heavier than on 4 June, they took the Haricot Redoubt and the ridge above the Kereves Dere ravine. They lost more than 2,500 killed and wounded, and the Turks, according to their official history, more than 6,000. Their 2nd Division had to be withdrawn from the peninsula. The success showed that with sufficient artillery support the Turkish trenches could be taken, and Hamilton wanted the attack on the left flank to follow as soon as possible. It was fixed for 28 June, once the French gunners had prepared the fire of their heavy howitzers in support of the British.
The western flank of the front was cut by Gully Ravine, a deep gully running parallel to the Aegean coast. The ground here was wild and broken, more like the hills above Anzac Cove than the gentle slopes of the rest of the Helles front. Between the ravine and the sea ran the Gully Spur ridge, on which the Turks had dug five lines of narrow, deep trenches, marked on British maps with the letter J. East of the ravine rose Fir Tree Spur, with trenches marked with the letter H. The two farthest Turkish lines on Gully Spur belonged to a new intermediate position that the Turks were building between the front line and the defences before Achi Baba. Taking them would outflank the Turkish centre.
Plan
The attack was commanded by General Henry de Lisle, in command of the 29th Division since 4 June. Besides his own division and the 29th Indian Brigade he was given the 156th Brigade of the 52nd (Lowland) Division, a Scottish Territorial division that had begun to arrive on the peninsula on 6 June and had not yet been in action. One of its battalions, the 1/7th Royal Scots, had lost half its men in the May railway disaster at Gretna in Scotland, on the way to the port, and went into battle at the strength of two companies.
The artillery numbered 77 guns, including 12 British and 9 French howitzers, and from the sea it was supported by a cruiser and two destroyers. For this one operation it was agreed to use almost a third of the entire stock of ammunition at Helles. In the end the British fired more than 16,000 shells, one and a half times as many as on 4 June on the whole front. The fire was concentrated on the trenches on Gully Spur, where the attack was considered the most difficult and the most important. On Fir Tree Spur, against trenches H12 and H12a, there remained only four and a half batteries of field guns firing shrapnel and one French howitzer. Not a single high-explosive shell was allotted to this sector. Hunter-Weston, reviewing the fire plan, noted the weak support for this brigade, but there were no more guns, and the French could not lend additional howitzers.
Every soldier was to have a triangle cut from a tin can tied to his back, so that the artillery observers could see in the sun how far the infantry had got. The red triangle later became the emblem of the 29th Division.
Course of the battle
28 June
The morning was hot and windless. At 9 a.m. the bombardment began. At 10.45 a.m. a battalion of the Border Regiment crossed open ground in three waves and took the Boomerang Redoubt, capturing a hundred dazed prisoners at small cost, much of the credit for which went to two French trench mortars. At 11 a.m. the artillery lifted its fire deeper and the infantry advanced on both sides of the ravine.
On Gully Spur the bombardment had been so heavy that the first two lines of Turkish trenches were already in ruins and their defenders killed or wounded. The 87th Brigade took its objectives exactly according to plan. The 86th Brigade followed it, and before noon the 2nd Battalion, Royal Fusiliers took the two farthest Turkish lines, J12 and J13. On the left flank the Gurkhas of the Indian Brigade, advancing along the coastal cliffs, took a headland above the sea, later named Fusilier Bluff, which became the northernmost Allied position at Helles. According to some works the front moved forward here by about half a mile, some 800 metres.
East of the ravine it was quite different. On the sector of the two Royal Scots battalions the bombardment had done its work, and the Scots took a Turkish trench in a dashing attack, though they lost almost all their officers. On the right flank the shrapnel had not damaged the Turkish trenches. The 1/8th Scottish Rifles, under fire from the front and from an undetected machine-gun nest on the flank, lost 25 of its 26 officers and more than 400 men in under five minutes. Divisional headquarters did not know the extent of the disaster and at 11.40 a.m. ordered trench H12 to be taken “at all costs”. The brigade commander, General William Scott-Moncrieff, personally led the last reserve and was killed at the end of a forward sap. Further attempts to take the trench, made in the afternoon and evening by the remnants of the Scots and battalions of the 88th Brigade, almost without artillery support, ended the same way.
Meanwhile the Turks went over to the counter-attack on Gully Spur. At about 2 p.m. they began bombing the eastern ends of the captured trenches, which abutted a side gully that the British called the Nullah. They had plenty of grenades, and these were much better than the British ones, improvised from jam tins. They drove the British out of the eastern halves of trenches J12 and J13. At about 6 p.m. Gurkhas of the 1/5th Battalion and a battalion of the Royal Munster Fusiliers recaptured them, but after dark the Turks struck again and the ends of the trenches above the gully remained in their hands. A battalion of the Royal Dublin Fusiliers, which tried to advance along the floor of the ravine, lost almost all its officers.
Turkish counter-attacks
The western part of trench J13 changed hands several times until on the morning of 30 June the Gurkhas finally took it. On the night of 30 June/1 July the Turks attacked them with grenades. The Gurkhas, who had no grenades, fell back, but recovered part of the trench in a counter-attack with kukri knives in their hands. The following night the Turks struck at trench J12. The lost section was recaptured by one and a half companies of a battalion of the Royal Inniskilling Fusiliers. Their commander, Captain Gerald O’Sullivan, and Sergeant James Somers received the Victoria Cross for it.
Turkish headquarters feared that the British would outflank the right wing of the front at Krithia. General Otto Liman von Sanders ordered the lost trenches to be recovered and brought reinforcements south from the whole peninsula and from the Asian shore of the straits. According to Turkish works, the commander of the Southern Group, the German General Erich Weber, opposed attacking without artillery support on a narrow sector on which the British could direct the fire of guns from land and from ships. Liman von Sanders nevertheless ordered the attacks to continue.
On the evening of 2 July, according to Turkish works with the fresh 1st Division, the Turks attacked across open ground towards Fusilier Bluff and the western end of trench J13. Fire from the destroyer Scorpion scattered the first wave. Just before dusk about 1,800 Turkish soldiers advanced from the Nullah and came under the fire of six batteries and the defenders’ rifles. Only a few, led by officers, managed to get within 40 yards of the British trenches. British patrols reported during the night that the ground in front of them was “strewn” with dead.
On 3 July Liman von Sanders himself came to the southern front. By that day three more divisions had arrived there: the 5th from Anzac, the 3rd from Kum Kale and the 4th from Bulair. The attack was postponed to 5 July and extended to the whole British front. At dawn on 5 July, after a bombardment that achieved little, the Turkish units left their trenches and were immediately repulsed with heavy losses. In the morning several more attempts were made to renew the attack, but the soldiers could no longer be made to rise. At about noon the Turkish assault collapsed along the whole front, and British losses were negligible.
Losses
According to the British official history, between 28 and 30 June the British lost about 3,800 men, most of them on the first day; initially these losses were estimated at about 2,000. The 156th Brigade lost 1,353 men, nearly half its strength. Afterwards British losses were small. The Turkish official history states that between 28 June and 5 July the Turks lost 16,500 men, including about 14,000 in the fighting on both sides of the ravine. They themselves called the battle of Zığındere the bloodiest engagement fought on the peninsula up to then.
Significance
The battle was a tactical success for the British, one of the few in the whole campaign. It showed that the Turkish trenches could be taken if the attack was prepared with enough howitzers and high-explosive shells, and at the same time that without them an attack ended in slaughter. The next day Hunter-Weston telegraphed that eight howitzers and 600 shells had been lacking for complete success. The Turks, as their official history admits, feared on the evening of 5 July that the British would outflank their right wing, and their troops on the southern front were exhausted and intermingled. The British and French, however, were equally tired and had neither the men nor the ammunition to exploit the victory.
At the end of June the Allies at Helles also lost an important commander. On 30 June, the day his soldiers took another Turkish redoubt above Kereves Dere, General Gouraud was seriously wounded by a shell from the Asian shore and had to return to France. On the Turkish side Liman von Sanders removed Weber from command; in the first half of July he was replaced by Vehip Pasha. The front above Gully Ravine did not move again until the end of the campaign, although both sides waged a fierce mine war here. In August the weight of the fighting shifted north, to Anzac and Suvla Bay.
Spotted a mistake?Report an error