1915: The war at sea
Battle of Dogger Bank
- Dates:
- 24 January 1915
- Front:
- War at sea
- Location:
- North Sea, in the area of the Dogger Bank, halfway between England and HeligolandOn the battle map →
- Sides:
- United KingdomDavid Beatty, Archibald Moore, Reginald Tyrwhitt, William GoodenoughGerman EmpireFranz von Hipper
- Result:
- British victory. The Germans lost the armoured cruiser Blücher and nearly a thousand men, the British not a single ship. The German battlecruisers managed to escape.
- Author:
- Łukasz Skowroń
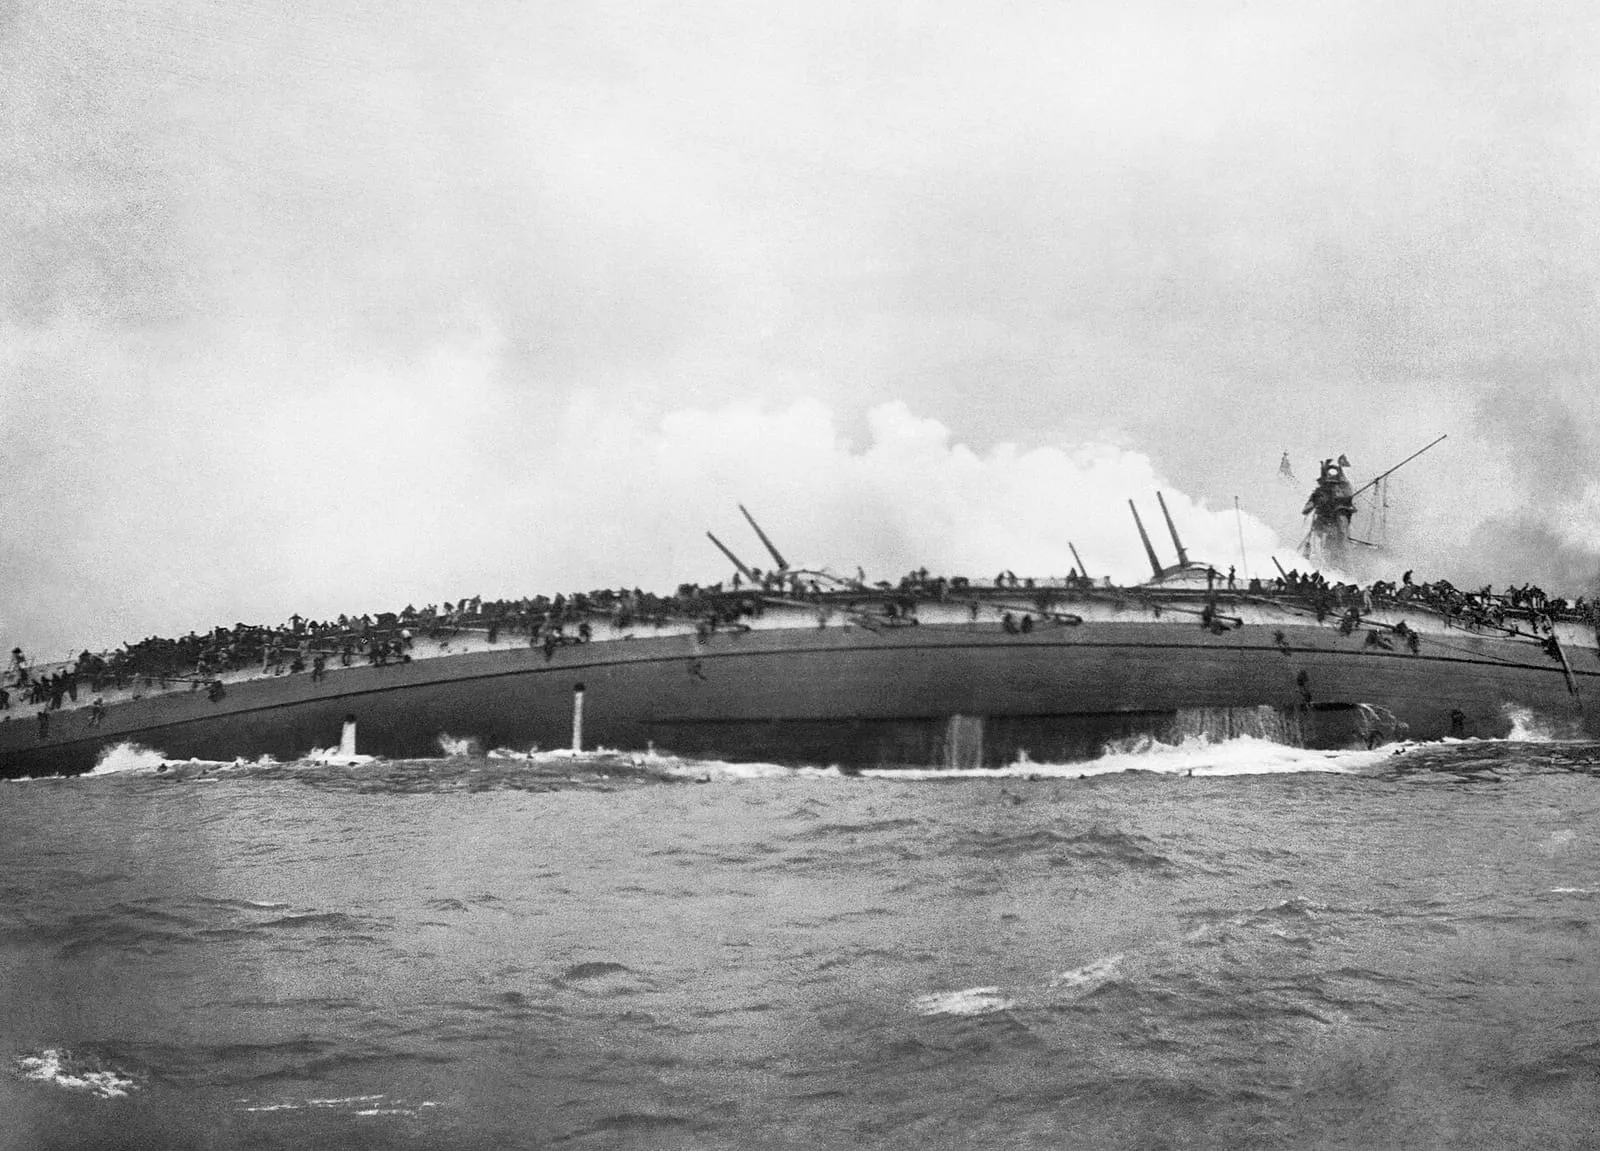
The Battle of Dogger Bank was fought on 24 January 1915 in the middle of the North Sea. It was the first clash of battlecruisers, the fastest and most powerful ships of both fleets. The squadron of Vice-Admiral David Beatty, forewarned by British intelligence, intercepted a sortie by Rear-Admiral Franz von Hipper and chased him for several hours towards the German coast. The British sank the armoured cruiser Blücher, but because of damage to the flagship and a misunderstood signal they let three German battlecruisers escape.
Name and dates
The battle lasted one day. First contact was made just after 7 a.m. on 24 January, and Blücher sank shortly after noon. The name comes from the Dogger Bank, an extensive shoal and rich fishing ground in the North Sea, near which the first encounter took place. The chase and the fighting itself, however, took place mainly in waters to the east and south-east of the bank. Times are given in British time. German accounts, reckoned in Central European Time, put them an hour later.
Background
After the Battle of Heligoland Bight Kaiser Wilhelm II forbade exposing the High Seas Fleet to serious losses. The Germans therefore confined themselves to quick raids by Hipper’s battlecruisers on the English coast. They hoped in this way to draw part of the British fleet out of its bases and destroy it with superior forces. The raid on Yarmouth in November was followed on 16 December by the bombardment of Scarborough, Hartlepool and Whitby. In both cases the Royal Navy failed to intercept the attackers, and public opinion in Britain did not spare the Admiralty its criticism. Beatty’s battlecruisers were moved to Rosyth on the Firth of Forth, closer to the likely targets of further raids.
In January the commander of the High Seas Fleet, Admiral Friedrich von Ingenohl, agreed to a new operation. Hipper was to sweep the Dogger Bank area, break up British patrols and destroy fishing boats which the Germans suspected of reporting the movements of their ships to the British. On the evening of 23 January the battlecruisers Seydlitz (Hipper’s flagship), Moltke and Derfflinger, the armoured cruiser Blücher, four light cruisers and 18 torpedo boats left the Jade estuary. The fourth battlecruiser, Von der Tann, was under repair, and the main body of the fleet remained in port.
The Germans did not know that the British were reading their signals. Since the autumn of 1914 the naval intelligence unit known as Room 40 had been using German codebooks, including one recovered by the Russians from the wreck of the cruiser Magdeburg. By 23 January the Admiralty already knew of the planned sortie. That same evening five of Beatty’s battlecruisers left Rosyth: his flagship Lion, Tiger and Princess Royal of the 1st Squadron, and New Zealand and Indomitable of the 2nd Squadron, commanded by Rear-Admiral Archibald Moore. They were accompanied by Commodore William Goodenough’s four light cruisers. From Harwich came three light cruisers and 35 destroyers under Commodore Reginald Tyrwhitt. As a precaution the battleships of the Grand Fleet were also sent to sea, but they did not arrive in time to take part in the fighting.
The chase
At about 7.15 a.m. on 24 January the light cruiser Aurora of Tyrwhitt’s force ran into the German cruiser Kolberg and the two ships exchanged fire. Hipper, seeing more and more smoke on the horizon, realised that he faced a strong force and turned for home. Beatty set off in pursuit. His ships were faster, and the Germans were also slowed down by Blücher. She was an older ship, more weakly armed than the battlecruisers, capable of at most about 23 knots. Beatty ordered his ships to steam at 29 knots, a speed some of them could not reach at all. The old Indomitable soon fell behind.
At about 9 a.m. Lion opened fire at a range of about 18 kilometres, then exceptionally long. The other British ships joined the fight as soon as they came within range. The first target was Blücher, at the rear of the German column, then fire was shifted to the battlecruisers. Through a misunderstanding in the distribution of targets Tiger fired at the same ship as Lion, so that Moltke went unengaged for a long time and could calmly aim at Beatty’s flagship.
Seydlitz and Lion
At about 9.40 a 343 mm shell from Lion pierced the armour of Seydlitz’s aft turret. The fire ignited the propellant charges in the working chamber, and the flames passed into the neighbouring turret. Both aft turrets were burnt out and about 160 men were killed. The ship was saved by flooding the magazines before the fire reached them. The Germans learned the lesson and before later battles changed the way charges were stored and handled.
The German ships now concentrated their fire on Lion. At about 10.20 several heavy shells, mainly from Derfflinger, struck the British flagship. Water flooded her compartments, the ship took on a list, and shortly before 11 her port engine stopped. Lion, hit more than a dozen times in all, fell out of line, and damage to her electrical system deprived her of wireless and most of her signal lamps. At about the same time Blücher, badly hit by Princess Royal, slowed down and began to fall behind. Hipper decided he could not save her without endangering his other ships, and left her to her fate.
The mistaken signal
At about 10.50 Beatty, convinced that he had seen a submarine’s periscope, ordered a sharp turn to port. There were no submarines in the area. A moment later two flag signals appeared on Lion’s mast: “course north-east” and “attack the rear of the enemy”. Beatty wanted his ships to pursue Hipper’s fleeing battlecruisers. Rear-Admiral Moore in New Zealand, who now took over effective command, read the two signals together: to the north-east lay Blücher. Tiger, Princess Royal, New Zealand and Indomitable therefore concentrated their fire on the lone, crippled cruiser, while the rest of Hipper’s force drew away to the east. Beatty tried to signal the ships to close with the enemy, but they were already too far away to read the flags.
Blücher fought to the end, although she was hit dozens of times. She was finished off by torpedoes from the light cruiser Arethusa. At about 12.10 the ship capsized and sank. British destroyers and Arethusa began picking survivors out of the icy water, but the German airship L 5 and a seaplane appeared and dropped bombs on them, probably mistaking the sinking ship for a British one. The rescue was broken off.
Meanwhile Beatty transferred from the disabled Lion to the destroyer Attack, and then to Princess Royal. He caught up with his ships only in the afternoon, when it was too late to pursue Hipper, who was approaching his own minefields. The British turned back. Indomitable took Lion in tow and brought her at a few knots to the Firth of Forth, which they reached only after more than a day.
Losses
Blücher had more than a thousand men on board. About 790 of them were killed, and according to the most commonly cited figures the British picked up 234 survivors, including several dozen wounded. On Seydlitz about 160 sailors were killed, on Kolberg three. In all the Germans lost about 950 killed.
British losses were small: just over a dozen killed, mainly on Tiger and the destroyer Meteor, and from several dozen to about 80 wounded, depending on the source. No ship was sunk, but Lion was out of service for four months. Seydlitz and Derfflinger were also badly damaged.
Significance
In Britain the battle was hailed as a great victory, and Beatty became a hero. A photograph of the capsizing Blücher, with sailors on her side, went round the newspapers of the whole world. At the Admiralty, however, it was known that the chance to inflict far heavier losses on the German fleet had been thrown away. The First Sea Lord, Admiral John Fisher, sharply criticised Moore, who was soon removed from command of his squadron and moved to a secondary post. The problems with signalling and target distribution were not solved. Nor did anyone draw conclusions from how close Lion had come to a magazine explosion.
In Germany the defeat had more serious consequences. On 2 February 1915 the Kaiser dismissed Ingenohl, and the new commander of the High Seas Fleet was Admiral Hugo von Pohl, who avoided risk even more cautiously. The Germans, not suspecting that their codes had been broken, attributed British vigilance to spies and fishing boats. For more than a year the big surface ships almost stopped putting out into the North Sea, and the burden of the fight against Britain passed to the submarines. Beatty’s and Hipper’s battlecruisers met again only in 1916, at the Battle of Jutland.
Spotted a mistake?Report an error